The thing most new yogurt makers don’t realize is that you need a little bit of ready made yogurt to make a new batch of yogurt. Which is no big deal if you and yours eat yogurt so much you need a steady supply. If not, it might be better to buy ready made yogurt every one in awhile in a large tub.
Save this recipe tutorial to your Pinterest boards for later! Share it with your friends!
When I first got my Instant Pot, we didn’t eat yogurt consistently enough to try making our own. When Lacey’s vet suggested we give her a little bit of plain yogurt with her food during a health emergency. I have never seen a dog love food as much as Lacey loves yogurt!
Seriously. She does a little yogurt dance at meal times and everything.
Did somebody say YOGURT?!
I love it more than peanut butter - and I really like peanut butter!
Lacey loved the yogurt so much her vet said we could keep adding a teaspoon of yogurt to Lacey’s kibble. Which means I’m in the perfect situation to try homemade yogurt. Unfortunately every Instant Pot yogurt recipe calls for a gallon of milk which makes too much for us to eat before it spoils. I need a yogurt recipe that makes a small amount like a quart or pint of homemade yogurt.
Then I realized that making yogurt is really more about following the process than using a specific amount of milk and starter. That’s when I started to make homemade yogurt in the Instant Pot which is hands down the easiest way to make yogurt!
And Lacey has had happy homemade probiotics in her tummy every since.
Here’s how.
How to Make Instant Pot Yogurt in Smaller Quantities Than a Gallon
As long as your cow milk contains some level of dairy fat you can use it to make yogurt. I have used whole milk, 2%, 1%, and even skim milk to make yogurt and it turns out great. The only difference is that the lower the fat content the more liquid they will be in the finished yogurt.
I used no fat milk by mistake and it did not work at all – which isn’t a surprise – but I have used whole fat powdered milk (I buy dried whole fat powdered milk on Subscribe and Save here to keep up with the yogurt making supply and demand) to make yogurt and it works great!
You will need the following yogurt making ingredients
Instant Pot
2 Tablespoons of plain yogurt (you need the yogurt culture to make yogurt) – you can also use a powdered yogurt culture like this one if you want to keep some on hand in your pantry for a first batch
Cow milk in the quantity you choose – a quart of milk works for our family. Basically I started with making yogurt with a gallon of milk and halved the recipe again and again to determine what amount we’ll finish before it spoils
Candy or meat thermometer – I use a simple meat, candy, and yogurt thermometer similar to this one
A sink full of cold water
Yogurt strainer bag – you can find yogurt and nut milk strainer bags here
Colander
Bowl
Disclosure: I am including affiliate links in this post for your convenience.
Step by Step How to Make this Easy Yogurt Recipe
A friend observed that making yogurt in an Instant Pot is like an Easy Bake Oven for grownups minus the light bulb cooking. It is a set and forget kind of thing. Basically the amount of liquid milk will make a little under the same amount of finished yogurt. I usually use a quart of milk to give me a little under a quart (give or take) of yogurt.
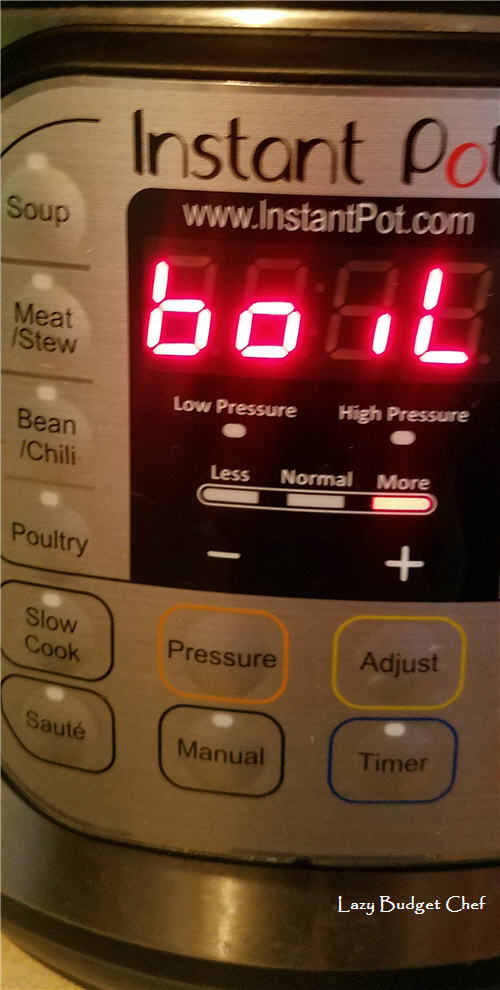
1. Pour the milk into the Instant Pot and put on the lid. Press the YOGURT button. Then press the ADJUST button until the word boil appears in the display window.

The Instant Pot will heat the milk to boiling and beep when it is ready. This won’t take very long.
2. The Instant Pot beeps when boil cycle is finished. Unlock the lid and take a reading of the warm milk with your thermometer. The milk should be between 179 and 182 degrees (F ).
3. Now we need to cool the warm milk to 110 to 115 degrees (F ) before we can add our yogurt culture otherwise the very hot milk may kill the culture – which can cause a yogurt fail.
Using potholders, put the inner pot containing the hot milk in a sink with a few inches of cold water. To speed things up a little bit I toss a reusable lunch box ice pack like this one in with the tap water in the sink. Use the spoon to stir the milk every so often being careful not to scrap the jelled milk from the bottom of the pot while you wait for the milk to cool. It isn’t a big deal if you accidently scrape the jelled milk when you are stirring but it may change the texture of your finished yogurt a little bit.
4. Use the thermometer to take the temperature of the milk. When the milk has cooled to 110 to 115 degrees (F ) remove the pot from the cold water bath and put the liner back into the Instant Pot. This usually takes me 5 to 10 minutes when I chuck an ice pack into the sink water and a little longer without ice.
5. Now it is time to make the yogurt culture. Put approximately 1/2 a cup of warm milk into a separate small dish (it doesn’t have to be an exact measurement but still enough liquid to dissolve and fully incorporate the starter.) Stir approximately 2 tablespoons of plain yogurt or a powdered yogurt culture into the warm milk until it is fully dissolved. (again it doesn’t need to be exact but it should be at least 2 tablespoons of yogurt to make sure you have enough culture to turn your milk into yogurt.)
6. Pour the liquid yogurt culture into the warm milk in the Instant Pot and stir it gently with a spoon into the rest of the warm milk being careful not to scrap the jelled milk from the bottom of the pot. Again, you won’t ruin the yogurt if you accidentally scrape the bottom of the pot but it may make your finished yogurt less smooth. Although truthfully I’ve done it and haven't noticed much of a difference in my finished yogurt but I’m making yogurt for a dog who doesn’t care as long as the yogurt is in her belly.
7. Put the lid on the Instant Pot. Press the YOGURT button. Then press the ADJUST button until 8:00 appears in the display window to tell you the Instant Pot will incubate the milk mixture for 8 hours.
You can use the plus and minus buttons to change the incubation time to up to 10 hours or more if you like your yogurt more tangy/sour. We aren’t fans of tangy yogurt so I let mine incubate for the minimum of 8 hours.
At this point I just go on with my day until the Instant Pot beeps to tell me the incubation cycle is done. I generally let the IP do its thing over night. It will keep the yogurt warm and unspoiled if it finishes before you wake up or tend to it.
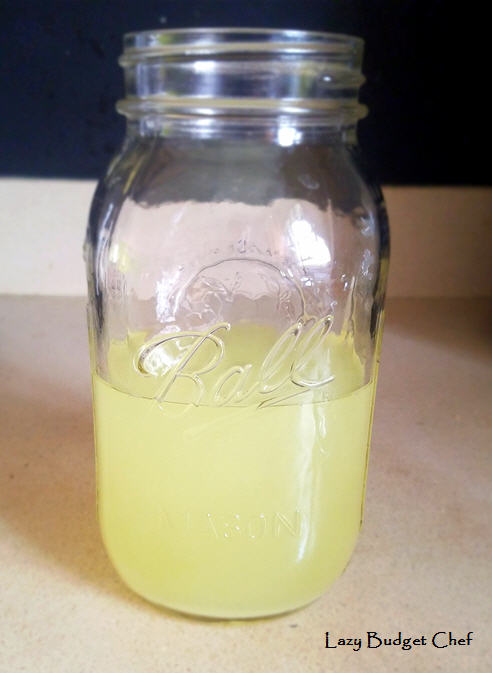
8. Remove the Instant pot and gaze lovingly into the small batch of yogurt you just made! This example has a little more sweet whey in it because I made it with 2% milk.

Yogurt! The yellow "water" is whey.
9. Time to strain the yogurt from the whey – or not.
- If you like French style yogurt: Thoroughly mix the yogurt and whey (it looks like water) together with a spoon and pour it into a separate container with a lid.
- If you like Greek style yogurt: Strain the whey from the yogurt using a yogurt straining bag in a round colander like these kind with a bowl underneath to catch the liquid sweet whey until the yogurt reaches the consistency you prefer.

How much whey you collect from your strained yogurt will depend upon how much of it you strain from your yogurt and the type of milk you used to make the yogurt. The less dairy fat in the milk the more whey you will find in your finished yogurt.
10. Pour the finished yogurt in a covered container the refrigerator to chill before eating. You can also save the sweet whey to use in cooking. My husband likes to use it in his post workout smoothies.
11. Eat. Enjoy! Repeat.
If you want to try using dried milk powder, you can read my how to make yogurt with powdered milk recipe here.
Looking for more homemade yogurt making tips and tools? Check out the following options - and more! - below!
Did you like this post? Get more like it by subscribing to the Lazy Budget Chef RSS feed or by subscribing to Lazy Budget Chef by email.


Comments
Post a Comment
Share what you have to say! The good and the not so good. Disagreeing is fine but no hair pulling please. Thanks!