I keep a small box of powdered milk in our pantry for bread machine recipes and for my husband to use in his coffee on those rare, pre pandemic occasions when we are out of milk.
Which is coming in handy now that we are out of milk.
I planned ahead when I placed our latest Instacart grocery order (
you can learn about Instacart here) but Ohio’s latest quarantine order limits the number of people allowed inside a store at one time. I’m pretty sure that is going to make our hard working grocery delivery hero’s job harder and we’ll have to wait a little bit longer for the delivery. It’s understandable. I’ll pivot. (
Disclosure: I am including affiliate links in this post for your convenience.)
Can You Make Yogurt From Dry Powdered Milk?
Save this easy yogurt recipe to your Pinterest boards for later! Share it with your friends!
I put off learning how to make yogurt in an Instant Pot because all of the yogurt making recipes and tutorials I found call for a gallon of milk yogurt which is way too much yogurt for my small family to eat before it goes bad. Once I realized that
making yogurt is really more about following the process than using a specific amount of milk that’s when I started to make homemade yogurt.
As long as your milk contains some about of fat you can use it to make yogurt. I have used whole milk, 2%, 1%, and even skim milk to make yogurt and it turns out great. The only difference is that the finished yogurt will have more watery whey in it. If want to make a firmer Greek style yogurt, you can easily strain the whey from the yogurt using a nut milk or yogurt strainer bag – a
yogurt strainer bag looks like this . I save the strained whey that is full of good for you probiotics and my husband uses it to make his post workout smoothies.
The only time I had a yogurt making fail is the time I accidentally used non fat milk instead of skim milk because there needs to be at least
some dairy fat in the milk for the culture to convert the milk into yogurt. Fortunately I have powdered whole milk in the pantry. I gave making dry milk yogurt in the Instant Pot a try – and it worked!
Easy Homemade Yogurt Recipe
A friend observed that making yogurt in an Instant Pot is pretty much like baking a cake in an Easy Bake Oven – minus the light bulb cooking. It is a set and forget kind of thing. Basically the amount of liquid milk will make about the same amount of finished yogurt. I usually use a quart of milk to give me a quart (give or take) of yogurt.
You will need the following ingredients:
Dry milk powder – do not use non fat milk powder! There must be some fat in the dry milk powder to convert into yogurt
Water
2 Tablespoons of plain yogurt – you need yogurt cultures to make yogurt. This is why it only makes sense to make your own yogurt if you and your family constantly eats yogurt.
You will need the following tools:
Instant Pot
Blender
Kitchen Thermometer – At first I used a simple meat thermometer I already had. When it broke I upgraded to a fancy digital thermometer with a probe. You can
find a wide variety of kitchen thermometer types here
Pot holders
Kitchen spoons
Measuring cup
Small dish
Cold water – Filling the sink with a few inches of cold tap water is fine
Step by Step How to Cook This Recipe:
1. Following the directions on the dry milk powder package, mix the water and powdered milk together in the blender to make your preferred amount of reconstituted milk. It is hard to get milk powder to thoroughly dissolve in water without the help of an electric blender. I suggest using the blender to mix the milk and allow it to sit a bit to let the undissolved powder settle, and then blend it a second time to ensure everything dissolves as it should.
See all of the undissolved dry milk powder on the top of my blender? This is why I suggest you let the reconstituted dry milk mixture sit for a few minutes and whip it into a frenzy with the blender a second time. It is difficult to fully mix powdered milk by hand.
Now that you have an amount of liquid milk, we can use it to make yogurt using your favorite yogurt making method. For this tutorial, I am using an Instant Pot yogurt maker.
2. Pour the milk into the Instant Pot and put on the lid. Press the
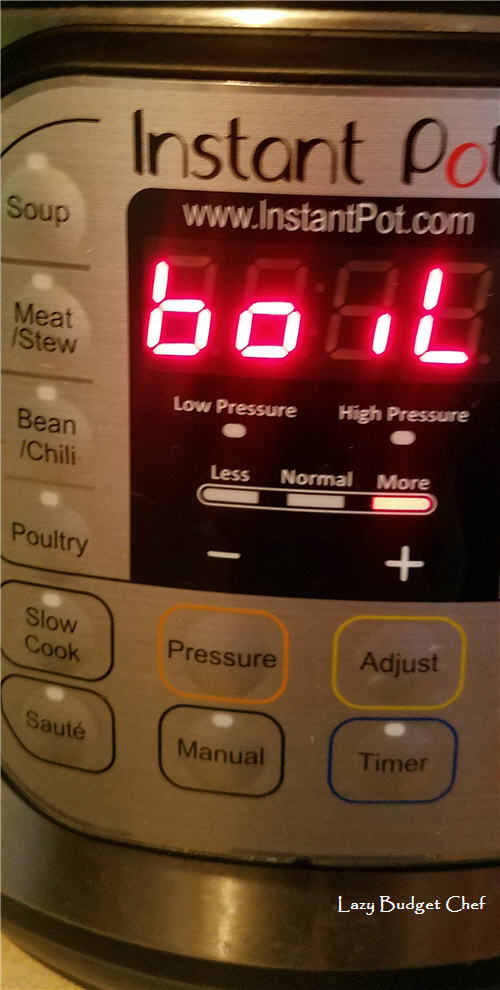
YOGURT button. Then press the
ADJUST button until the word
boil appears in the display window. The Instant Pot will heat the milk to boiling and beep when it is ready. This won’t take very long.
3. Take a reading of the warm milk with your thermometer. The milk should be between 179 and 182 degrees (F ).
4. Now we need to cool the warm milk to 110 and 115 degrees (F ) before we can add our yogurt culture. Using potholders, put the inner pot in a sink with a few inches of cold water (some add ice cubes. I just use cold water from the tap.) Use the spoon to stir the milk every so often being careful not to scrap the jelled milk from the bottom of the pot while you wait for the milk to cool. This won’t take very long either.
5. Use the thermometer to take the temperature of the milk. When the milk has cooled to 110 and 115 degrees (F ) remove the pot from the water bath and put the liner back into the Instant Pot.
6. Put approximately 1/2 a cup of warm milk into a separate small dish and stir with a spoon to dissolve 2 tablespoons of yogurt into it. This makes the culture for our yogurt.
7. Pour the liquid yogurt culture into the warm milk and stir it gently with a spoon being careful not to scrap the jelled milk from the bottom of the pot. You won’t ruin the yogurt if you accidentally scrape the bottom of the pot but it may make your finished yogurt less smooth.
8. Put the lid on the Instant Pot. Press the
YOGURT button. Then press the
ADJUST button until
8:00 appears in the display window to tell you the Instant Pot will incubate the milk mixture for 8 hours. You can use the plus and minus buttons to change the incubation time to up to 10 hours if you like your yogurt a little more tangy/sour. At this point I just go on with my day until the Instant Pot beeps to tell me the incubation cycle is done. You can also let the IP do its thing over night and wake up to freshly made yogurt.
9. Remove the Instant pot and gaze lovingly into the pot of yogurt you just made!
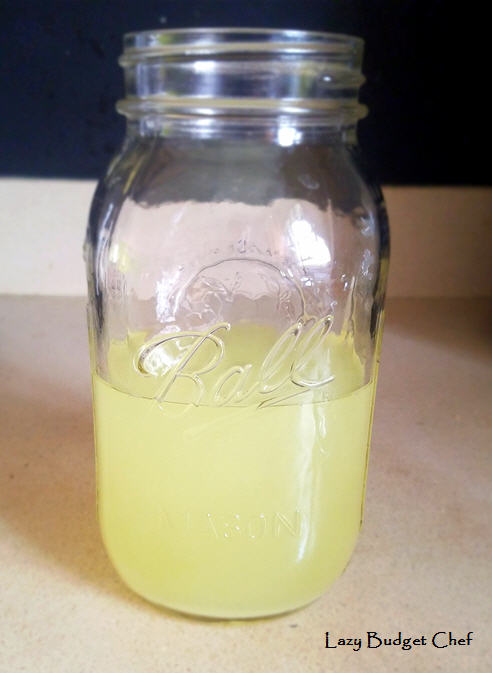
Yogurt! The yellow "water" is whey.
- If you like French style yogurt: Thoroughly mix the yogurt and whey (it looks like water) together with a spoon and pour it into a separate container with a lid.
- If you like Greek style yogurt: Strain the whey from the yogurt using a nut milk straining bag in a round colander like these kind with a bowl underneath to catch the whey until the yogurt is the consistency you like and pour it into a separate container with a lid. Don’t worry if you strain too much whey and make your yogurt too thick. You can always mix a little bit of liquid whey back into the yogurt until it is your desired consistency. Aren’t you glad we saved that strained whey instead of letting it go down the sink?
How much whey you collect from your strained yogurt will depend upon how much of it you strain from your yogurt and the type of milk you used to make the yogurt. The less dairy fat in the milk the more whey you will find in your finished yogurt.
10. Put the finished yogurt in the refrigerator to chill before eating.
11. Eat. Enjoy! Repeat.
Looking for more yogurt making tools and ideas? Check out the following options - and more! - below!
Did you like this post? Get more like it by
subscribing to the Lazy Budget Chef RSS feed or by
subscribing to Lazy Budget Chef by email.


Comments
See you there!
Melissa | Little Frugal Homestead
Miz Helen
Post a Comment
Share what you have to say! The good and the not so good. Disagreeing is fine but no hair pulling please. Thanks!