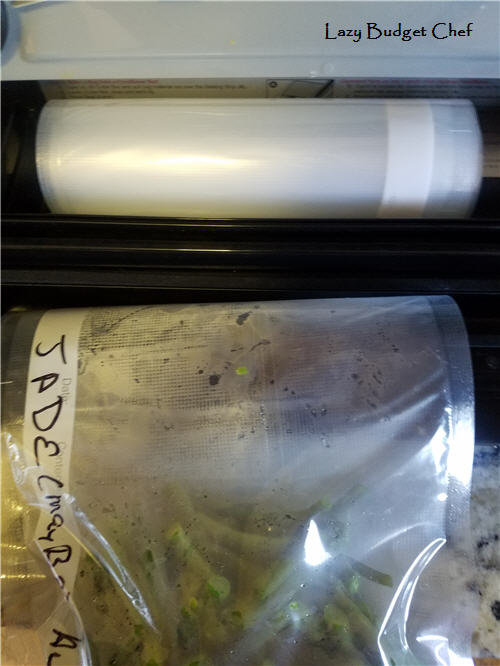
Last weekend my husband and I visited his parents to help them pick and preserve the homegrown bean explosion in their garden.
You can preserve fresh green beans by canning, freezing, and dehydrating. Although I’m not personally a fan of the taste of rehydrating dehydrated green beans (though Lacey is) I didn’t even give dehydrating a thought. I don’t know how to pressure can and since I was there to do this
for my mother in law instead of her doing it while I watched and learn we were all in agreement that freezing is the way to go.
Save this food preservation tutorial to your Pinterest boards for later! Share it with your friends!
Besides we were all in agreement that we like the taste of frozen green beans better.
Which totally works for me because freezing green beans is the laziest way to preserve garden vegetables and they retain more nutrients when they are frozen than when pressure canning them (although not by much.)
Freeze Fresh Garden Green Beans the Quick and Easy Way!
You should blanch fresh green beans before you pop them in the freeze so the beans retain their taste, texture, and color after you thaw and cook them.
If you have a freezer that freezer burns the food you put in it with a white, hot fiery passion like I do, I recommend you vacuum seal your beans using a
Food Saver like this one (
Disclosure: I am including affiliate links in this post for your convenience.) I’m not thrilled with the disposable packaging the vacuum sealer requires but after trying every other way to wrap and store food in the freezer and losing it to freezer burn, my Food Saver is the only thing that protects my food in the freezer from freezer burn.

And yes, I tried the sucking the extra air out of a zipper freezer bag with a straw hack. It didn’t work.
You will need:
A bunch of fresh green beans
Cutting Board
Knife
Pot of hot water on the stove
Bowl of cold water
Colander
Vacuum sealer –
you can find several different brands of vacuum sealer machines here
Vacuum sealer bags - Don’t cheap out on bags. Yes, they are on the pricey side but every time I tried a cheaper generic brand, they have not worked as well for the long term in my freezer.
I recommend these food vacuum sealer bags here. Learn from my mistakes and don’t be me!
Sharpie marker
Step by Step How to Make it Recipe:
1. Wash the green beans in the colander with water and use the cutting board and knife to cut the ends off the green beans. You can cut the green beans to a smaller size if desired.
If you don’t want to cut them you can go old school and snap the ends of the beans and to size!
2. Put the green beans in a pot of water on the stove over medium heat for approximately 3 to 5 minutes. The idea to slightly heat the beans, not cook them all the way through.
3. Remove the beans from the stove and immediately put them in the bowl of cold water. The cold water will arrest the cooking process which is exactly what we want.
4. Use the Food Saver to seal the end of the freezer bag and cut the bag to your desired size.
5. Use the Sharpie marker to label the freezer bag with the type of bean and the date. I always date everything I put in my freezer so I know what items I should use first and which items can wait a bit.
6. Fill the vacuum sealer bag with blanched green beans. Make sure you leave enough room for the top of the bag to fit into the vacuum sealer tray!
7. Place the top of the full vacuum sealer bag in the Food Saver tray. Close the lid and use the side leaver to lock the lid into place.
Press the
Vacuum and Seal button. The machine will automatically stop when all of the air is sucked out the bag and it is sealed shut.
If the Food Saver will not seal the bag check:
- That there isn’t too little or too much of end of the bag is in the Food Saver tray.
- That there isn’t any food near the top of the bag that is interfering with the Food Saver locking into place when you press the side locking lever.
- That the inside foam gasket seals are not bent or smashed. If so, remove the foam gasket and run it under water to fluff/uncompress it and return it to its place in your Food Saver. If the gasket is too far gone you can buy replacement Food Saver foam gaskets here.
9. Put the blanched and vacuum sealed green beans in the freezer for later!
If You'd rather buy than DIY check out the following ideas - and more! - below!
Did you like this post? Get more like it by
subscribing to the Lazy Budget Chef RSS feed or by
subscribing to Lazy Budget Chef by email.


Comments
Kippi
Post a Comment
Share what you have to say! The good and the not so good. Disagreeing is fine but no hair pulling please. Thanks!